Pages

Saturday 29 May 2010

Promarker Blog Candy Winner

The winner of the Promarker Stamp set 1 Blog candy is......

Chris (Wellnifty) said...
Great tutorial Jak, I wondered how you used the blender pen, I've just got a few pens but haven't used them yet. Will have a play now. Thanks for the chance of getting the candy I'll post a link on my blog xx
29 May 2010 08:01

Congratulations Chris

Drop me an email with your address details and I'll post them out for you.


post signature

Tuesday 25 May 2010

Lighter Shades with a Blender Pen

I wanted to show you a way of getting really pale shades with the Promarker as i know we often feel we need an even lighter shade in the range of colours, so for this tutorial i will be using the Pale Pink and the Blender Pen Promarkers and a Digi Stamp by Mo Manning called My Friend.

Take the Blender pen and lay down a layer of blender all over the cardigan, I've marked the area in an orange outline so you can see where i am using it, this blender solution will hepl to keep the paper wet (damp) enabling a light colour blend.


Next using the Pale Pink Promarker colour where the darkest shade would be ( creases of the cardigan, under the arm and at the edges)

Take the Blender pen and stroke the nib over the chisel end of the Pale Pink Promarker to pick up a little of the colour.


Work with the blender pen in small circular strokes over where the pale pink Promarker meets the white on the cardigan towards the centre. The pink ink on the blender pen will flush away so you will need to keep picking up the pink shade onto the blender pen as you work.

You can see that the Pale Pink and the Blender Promarker pens have worked nicely together and without the mottled effect that can happen.
The wonderful folk at Letraset have given me a Promarker Rubber stamping Set 1 to give away to a lucky person.


Leave me a comment on my home page under the Promarker Knowhow Tutorial post and add a link on your blog to www.jakheath.com to be in for a chance to win the set and I will pick a winner on Saturday 29th May

post signature

Friday 7 May 2010

Colouring Blonde Hair

Today I'm going to walk you through colouring blonde hair, I'm hoping this is helping to take the sting out of colouring for you all and it helps you when making your cards with Promarker coloured images and digi stamps.
We will be working on the same Paper dolls image from Mo's Digital Pencil Too and 3 shades of Promarkers, Sandstone, Mustard & Primrose.
I told you in an earlier post that I always work with some scratch paper at my side to test the colours on I like to be sure that they will all match and blend well together before touching the image with them, below you can see my test.


lets start with the Sandstone Promarker, this is the darkest of the 3 colours we will use so we will add it to the darkest parts of the hair.
At the very roots, the very tips and the under side of the hair (bunches)


Next take the Mustard Promarker and using short stroke colour over the sandstone ad just a little way past it, leaving white patches where the lightest colour will go for the highlights I've marked the hair with arrows so that you can see where I've added the Mustard colour.


Finish by using the Primrose Promarker working in short stroke over all of the hair always working in the direction that the hair is growing from root to tip.


post signature

Tuesday 4 May 2010

Colouring Fair Skin

I'm going to walk you through colouring fair skin, I will be using 2 Promarker, Soft peach and Ivory, the Image I'm using is by 
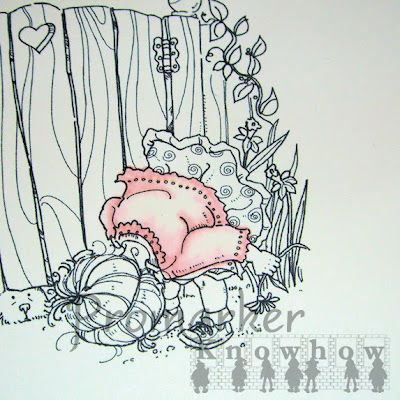
Mo Manning and called Birthday Party Paper Dolls.


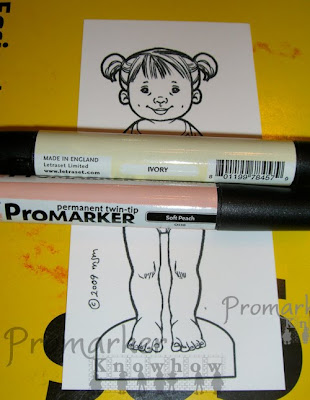
Starting with the Soft Peach promarker colour where the shadows and darker areas would be on her skin, under her hair line, around the edges of her face, arms and legs, her cheek bones,her knees and elbows and under her chin etc.


You can now start blending with the Ivory Promarker, you can see on the face half coloured that you start by colouring over the Soft peach that is already on the image, working in small circular motion from the out edge into the centre of the face, you may need to go over the joining edge a few times until the two colours blend together, looking at the two images of the face you can see on the left image that it still looks a little patchy where the two blend, on the right image you can see that once it is dry it has smoothed out, this is because the ink still carry's on blending whilst drying, so on the second image you can see it is the right side of her face that is still drying.

Continue to blend the Soft Peach using the Ivory Promarker colour using a circular motion where the two colours meet until the whole image is coloured.


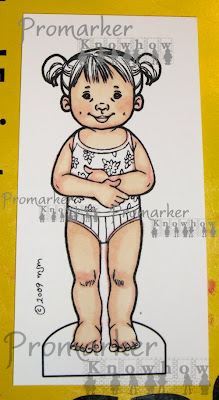
Lastly I went back over some of the shaded areas with the Soft peach shade as I needed where the deepest shadows would be to be a little darker.
I marked these areas with arrows in the image below so you can see exactly where I added the extra Soft peach colour.
If you compare both images the one above and the one below this text you will see the difference


Sunday 2 May 2010

Choosing Colours

This is the set up I work with when colouring with promarkers, I use an old telephone directory to colour on top of, partly because i like to work on top of other paper and partly because the ink tends to bleed through to the other side of the card you are colouring on and I can just throw away the under sheet with no extra expense.

You can see from this close up how I lay down the colours before I start colouring the image.

By laying the colours side by side you can see which colours will work well together, at the bottom of this picture you can clearly see that one of the pin shdes doesn't work with the others.